How to Install Your Vent Covers
A straightforward DIY install for standard vent openings. Not comfortable doing it yourself? Order here.
What you'll need
- Drill with masonry bit
- Screwdriver
- Tape measure
- Screws & wall plugs
- Ladder (if working at height)
- Safety gloves
Step by step
- 1
Measure your vent opening
Measure the height and width of the existing vent opening to confirm your Vent Cover is the right fit.
- 2
Remove the old cover
If you're replacing an existing vent cover, carefully unscrew and remove it, and clear away any debris or old sealant.
- 3
Position the new cover
Hold the new Vent Cover over the opening, level it, and mark the screw hole positions on the wall.
- 4
Drill pilot holes
Drill pilot holes at the marked positions and insert wall plugs if you're fixing into brick or masonry.
- 5
Fix the cover in place
Screw the Vent Cover securely into place, checking it sits flush and level against the wall.
- 6
Check the seal
Inspect the edges of the cover to make sure it's weatherproof and there are no gaps letting in draughts or moisture.
Do's and Don'ts
Real examples of vent covers done right — and a couple of ways people accidentally block their own ventilation.
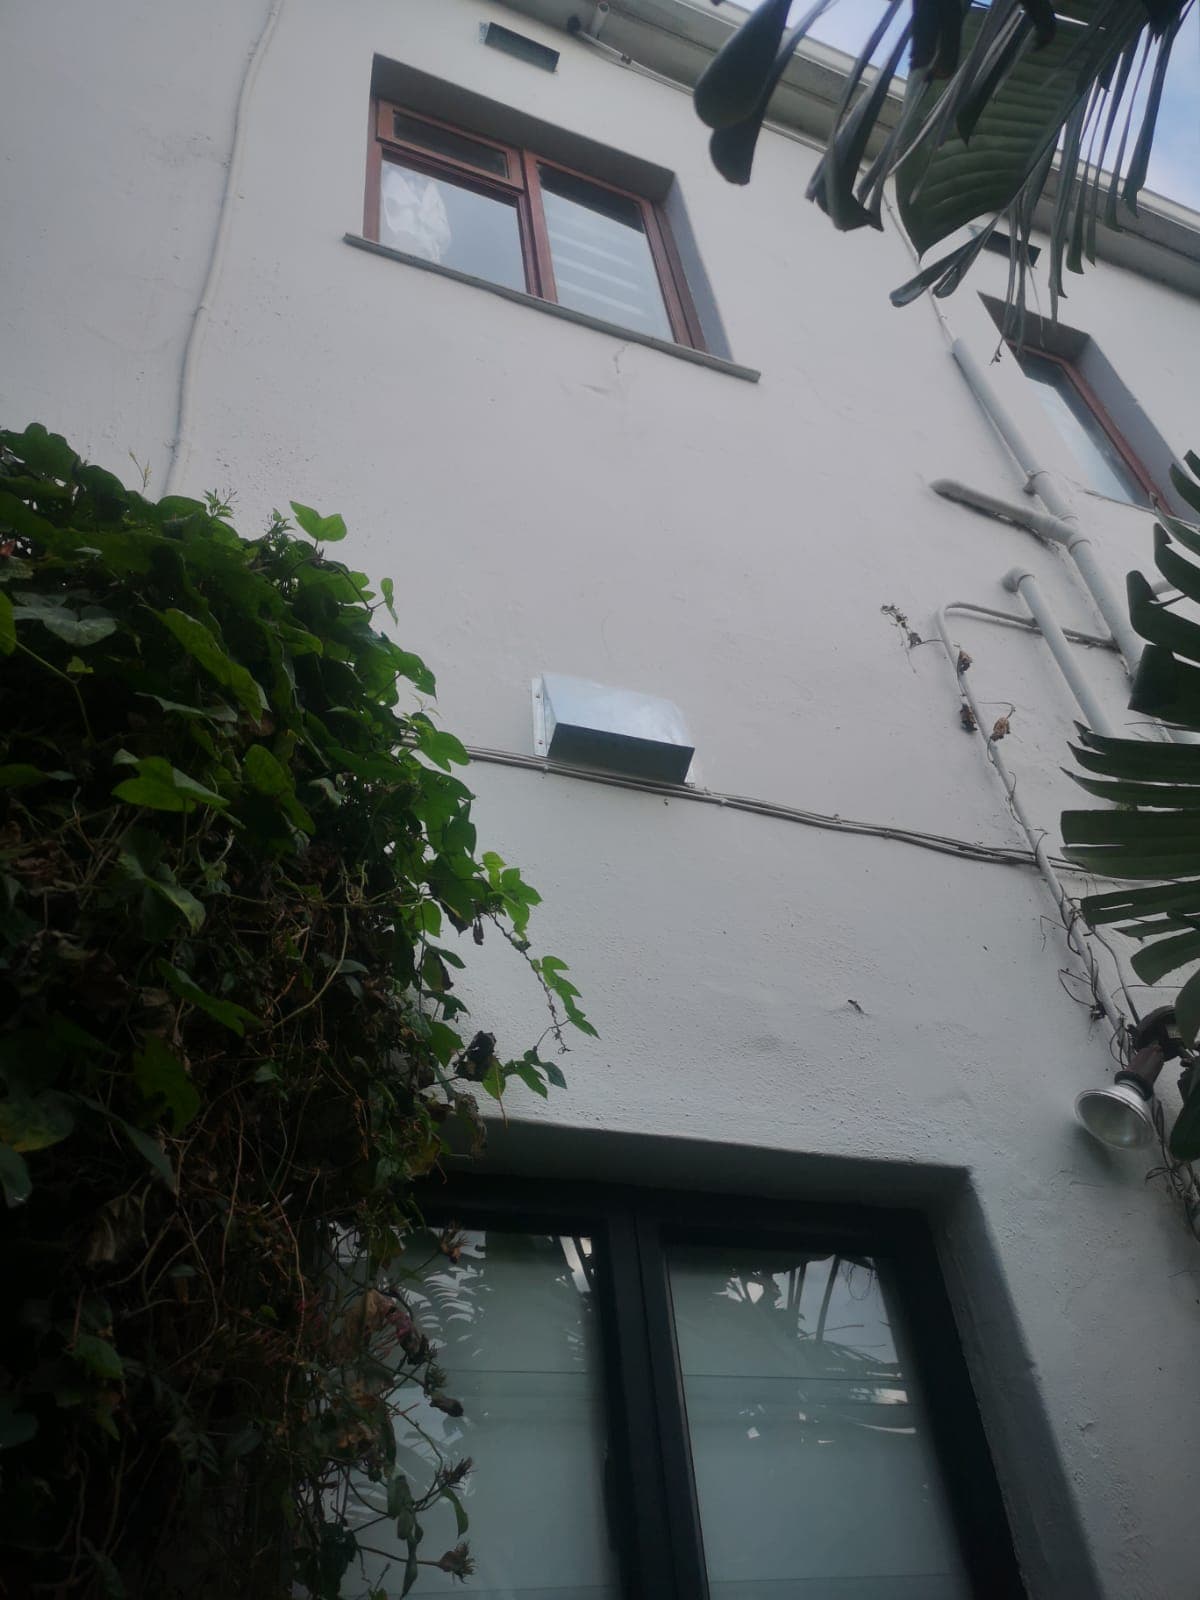 Do
Mount a proper hood-style cover directly over the vent opening.
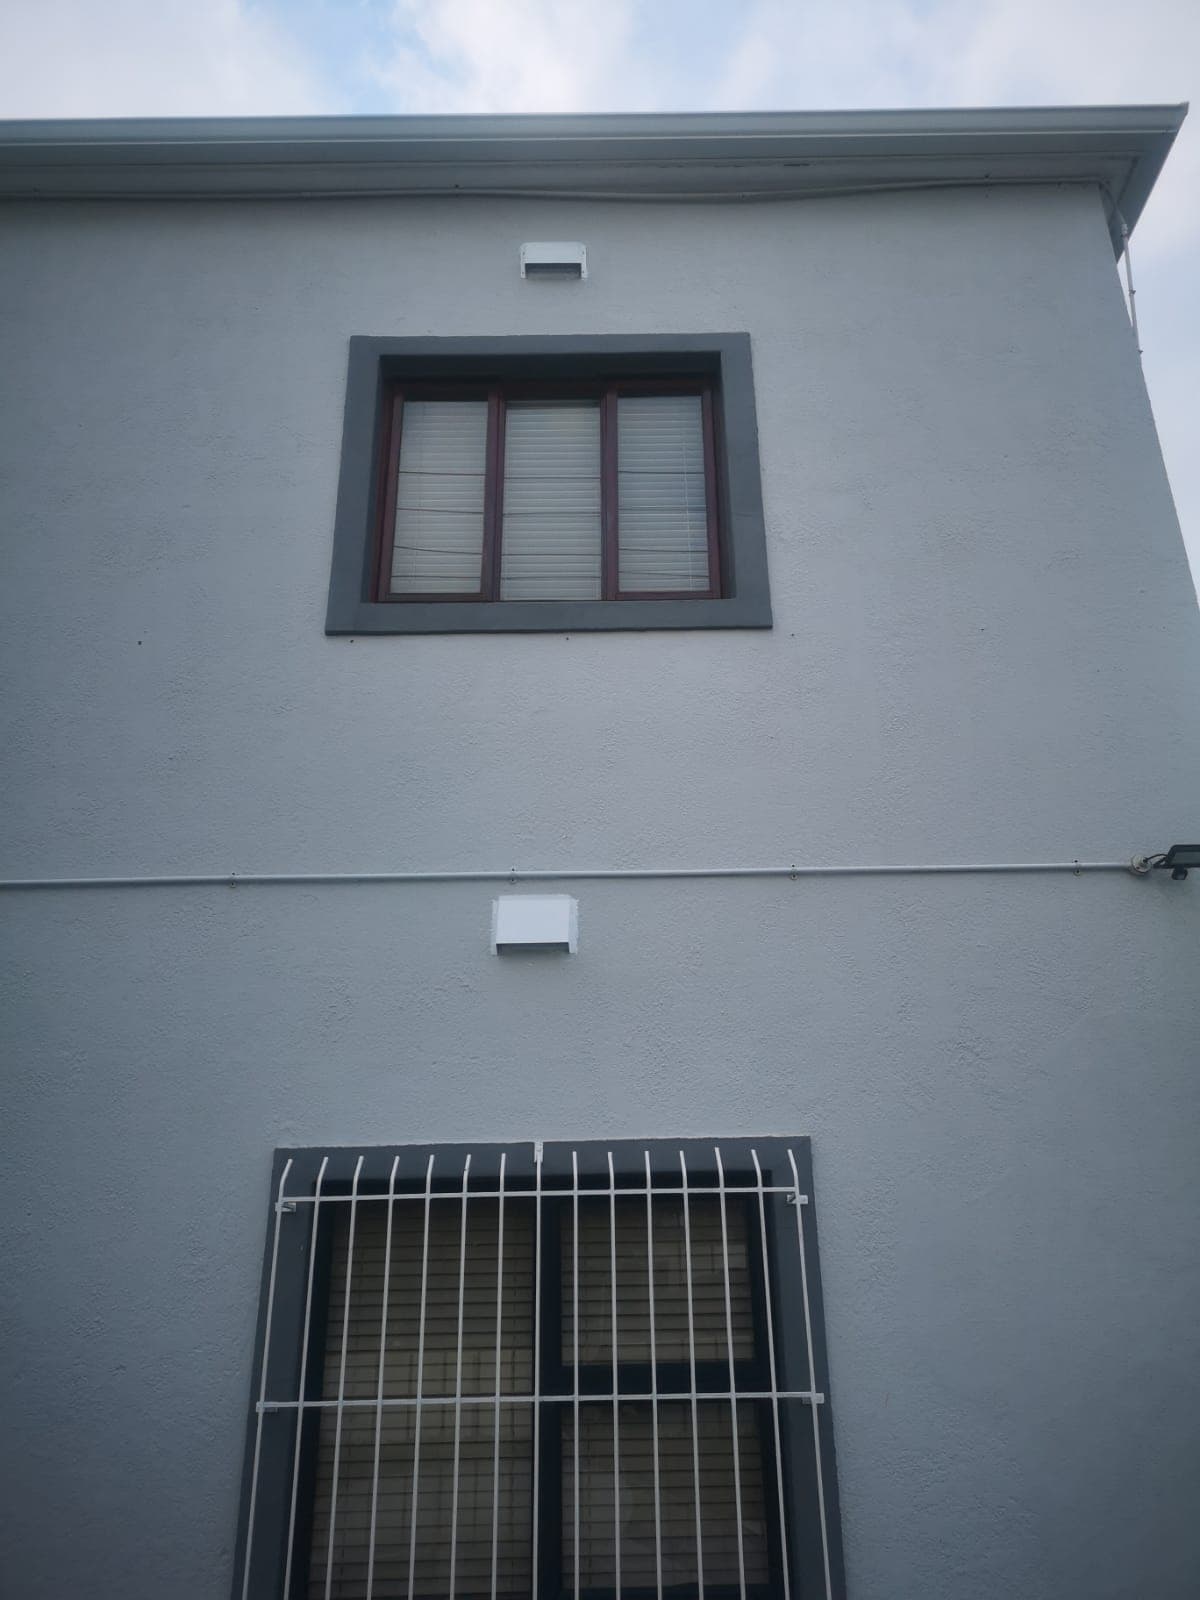 Do
Keep it flush, level, and clear of plants or obstructions.
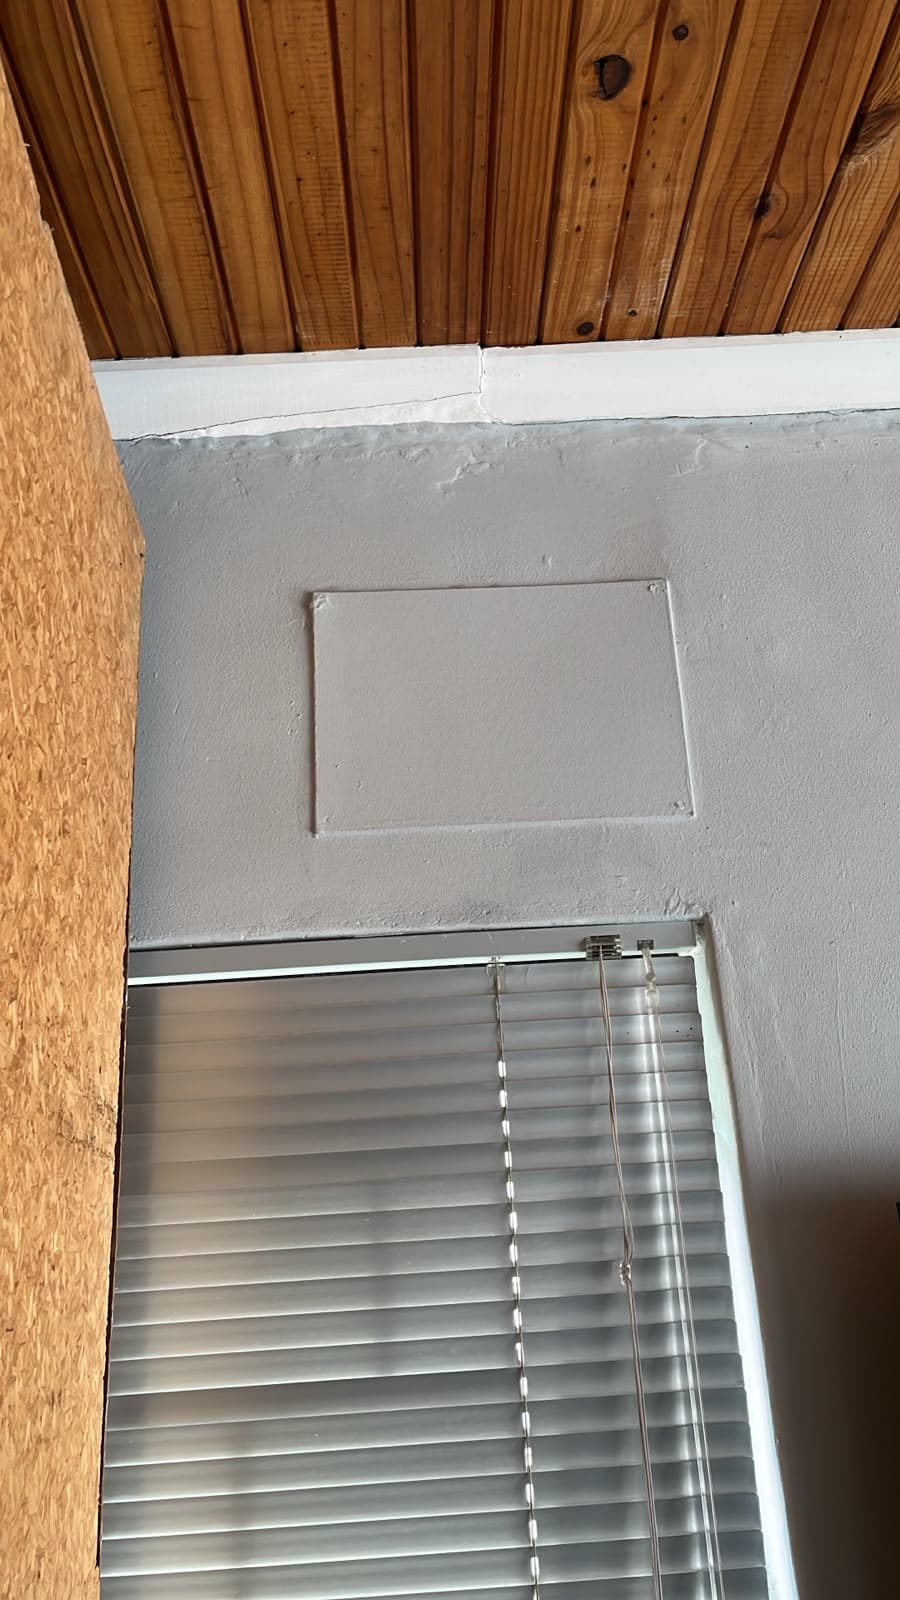 Don't
Don't plaster or seal over the opening — it blocks airflow completely.
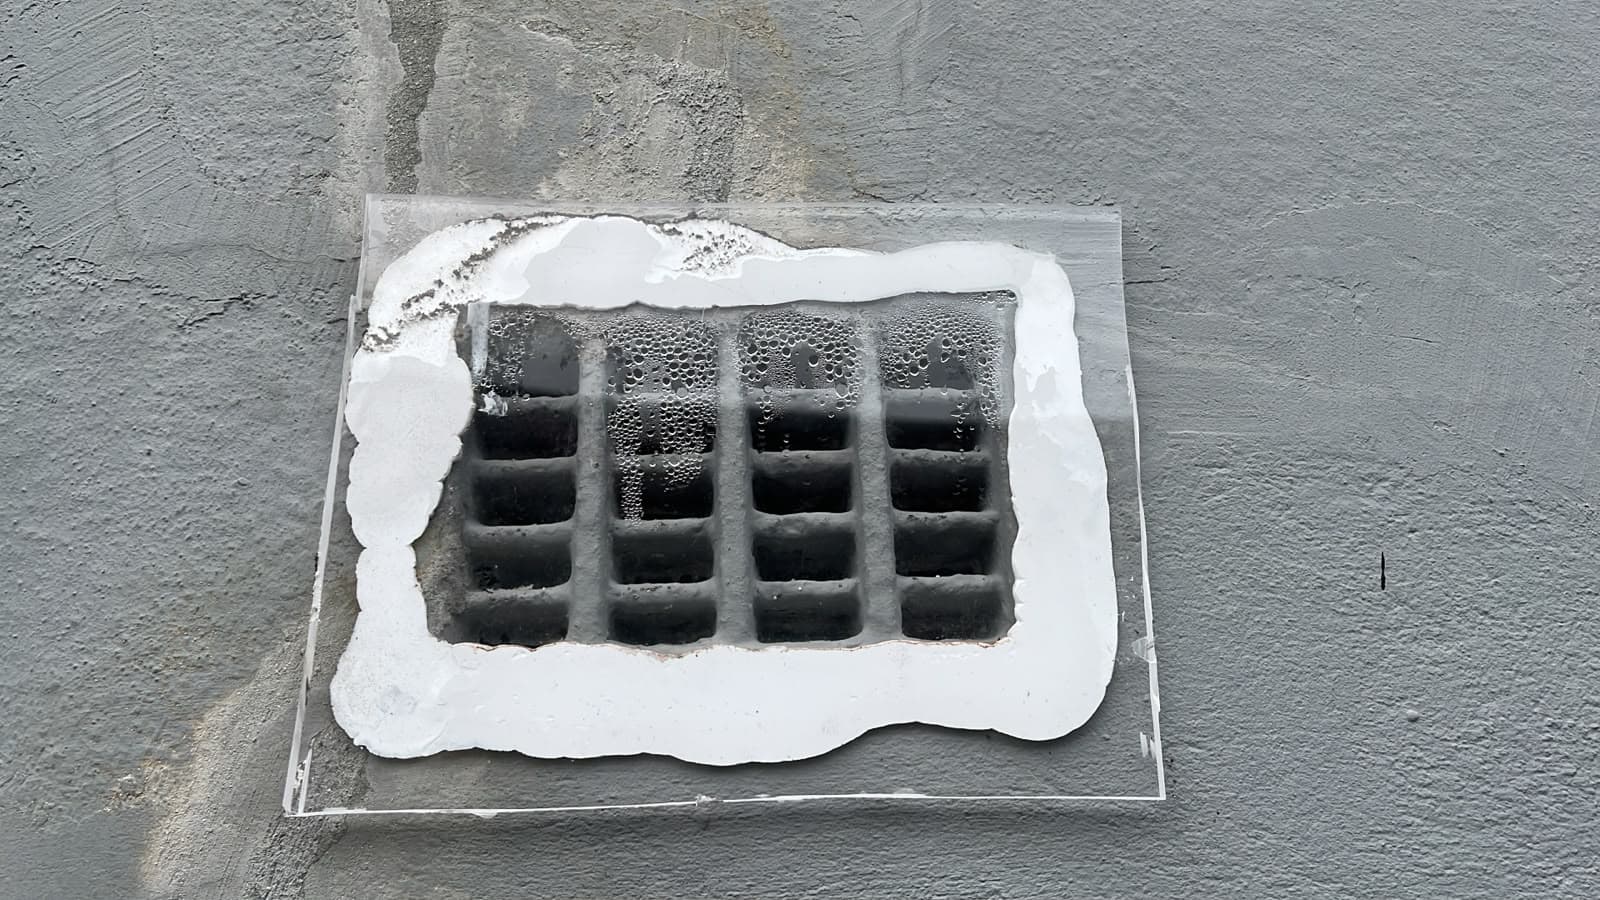 Don't
Don't seal it with plastic sheeting — it traps condensation instead of letting the wall breathe.